Bring a little gore into your October decorating with these Halloween Bloody Bones Decoration.
Hey, I have a little secret. I’m not decorating for Halloween, but rather for the October 22 Walking Dead premiere. Last year, I shared a mini Terminus buffet to celebrate the Walking Dead. This year, I’m keeping with the Terminus theme and decorating our mantel with my interpretation of the Terminus ‘church’.
I’ve already hung up the Terminus motto, “Never Again. Never Trust. We First, Always”, to use as my backdrop along with a few candles. However, when I looked at the mantel, it was missing something…bones! After all, the Terminus people were cannibals. So, a few bloody bones fit in nicely with the Terminus theme.
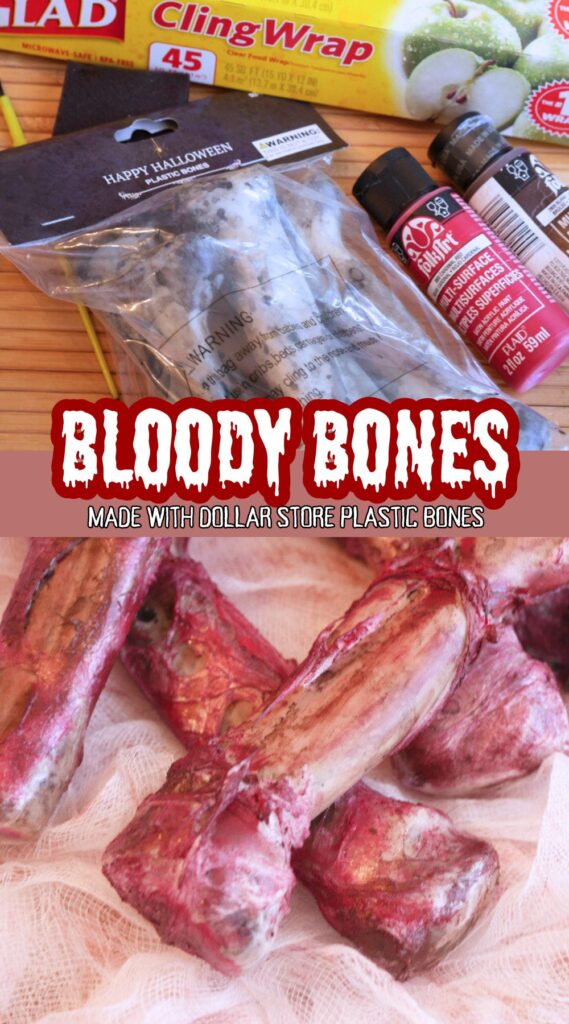
Halloween Bloody Bones Decoration
This project uses a heat gun, which gets extremely hot. If doing this project with kids, only an adult should use the heat gun.

Halloween Bloody Bones Supplies:
The bones I used came from the 99 Cents Only store, but you can use any plain bones.
- plastic bones (99 Cents Only)
- heat gun
- plastic cling wrap
- acrylic paint – umber and a deep red color
- paint brush and sponge brush
- optional – metal tongs to hold the bones while using the heat gun
How to Make Halloween Bloody Bones:
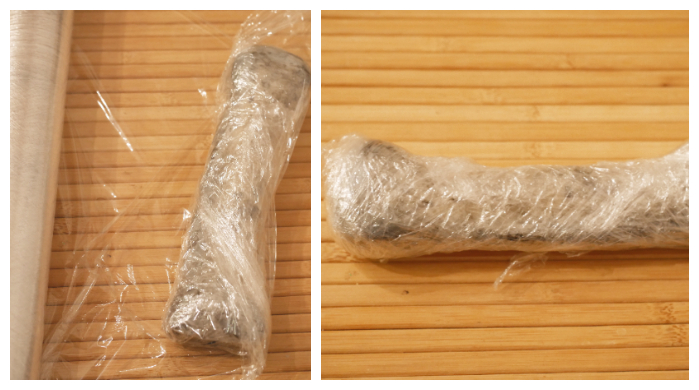
- Step 1. Wrap each plastic bone 4-5 times with plastic cling wrap. Concentrate the wrap in areas that you want more ‘meat’.

- Step 2. Use the heat gun and heat the plastic wrap. It should shrink and tear in a few places. Be careful as the plastic bones can get hot, so if necessary, use metal tongs to hold the bones.

- Step 3. Time to paint! Water down the umber paint and add it to any bare area.
- Step 4. Mix together the red and umber paint. Sponge and paint onto the melted cling wrap until the desired look is achieved. Let dry.

Completed Halloween Bloody Bones – Before & After
These Halloween Bloody Bones fit in perfectly with my Terminus theme (zombies) and would work well in other Halloween themes too. And since the bones are meant to look like rotting flesh, there isn’t a right or wrong way to do this craft project. Even ‘mistakes’ will look great!
I hope you liked this easy project and give it a try. If you try it, let me know how yours turned out in the comments below!














Gosh, I’ve never seen a craft quite like this before! They look so lifelike! Thanks for such a bloody, unique idea!
Wow! These are realistic looking, Erlene! Great tutorial! Thanks for partying with us at Snickerdoodle. Pinning.
Wow Erlene! These are pretty darn creepy! Great job! I like that heat gun! I think I need one! #MM Sharig on Twitter
Kim
Oh, that’s nasty – in the best possible way. They look so real. Yuk !!!! (great job!)
How disgustingly cool, lol. Great ideas for a Halloween party or display.