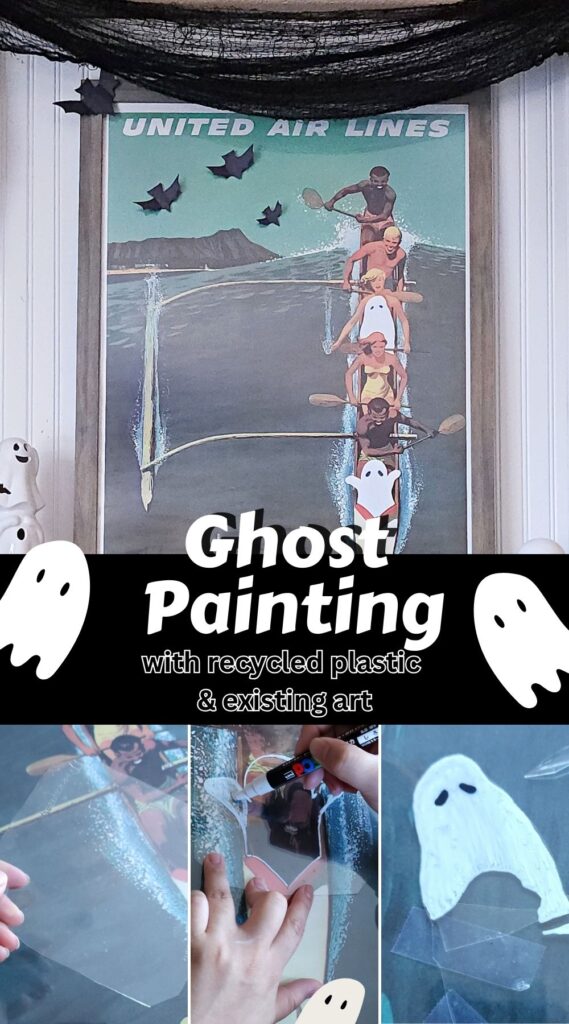
The Ghost Painting Trend is taking social media by storm. Here’s my version of this popular Halloween decor trend using existing art and recycled plastic.
Here’s my version of the popular Ghost Painting Trend using my exisitng wall decor. It’s a quick and easy, low budget fall craft that can be done in under 30 minutes or less! And best of all, since you’re using your own wall decor, the ghost painting will fit your home aesthetic.
What is the Ghost Painting Trend?
The ghost painting trend is a popular Tiktok fall craft project. The goal of the project is to upcycle thrifted paintings by painting a ghost or ghosts onto it. Usually the paintings used are landscape scenes, but you can use any painting you like.
What to Use for the Ghost Painting?
The best type of picture or painting to use for this technique is one that is behind glass or plastic. This is because the ghost will be taped onto the picture or image being used.
Supplies for Making a Ghost Painting
- Existing wall art – Must have a glass or plastic cover over the image.
- Clear plastic – Any thin clear flat plastic can be used for this project to make the ghost easy to remove from the picture. I used a muffin container.
- Scissors – To cut the plastic ghost shapes.
- Posca paint pens (if making with kids), spray paint (for adults) – White and black colors. I used Posca pens as they are easy to use and can be washed off if a mistake is made. Posca paint pens are a great choice if doing this project with kids. Posca paint pens, can also be used directly onto the glass of the picture and wiped off after the Halloween season. The paint won’t be permanent unless the glass is baked for 45 minutes at 320°F. DO NOT paint acrylic paint onto glass or plastic cover as it is harder to remove when dried. The downside to Posca paint pens AND acrylic paint is that it can leave steak marks. If streak marks bother you, use spray paint in light layers.
- Clear Acrylic Sealant – Needed to make the paint scratch resistant.
- Clear tape – To secure the ghost shapes to the picture and hold the clear plastic down.
How to Make a Ghost Painting with Existing Art
Prepping to Paint a Ghost
Step 1. Cut out a flat portion from a plastic container (this is from a muffin container). Wash, clean, and dry to prepare it for the ghost painting.
Step 2. Choose where you want to place your ghost on the picture. Then, use tape to secure the plastic in place on the corners.
Painting Ghosts
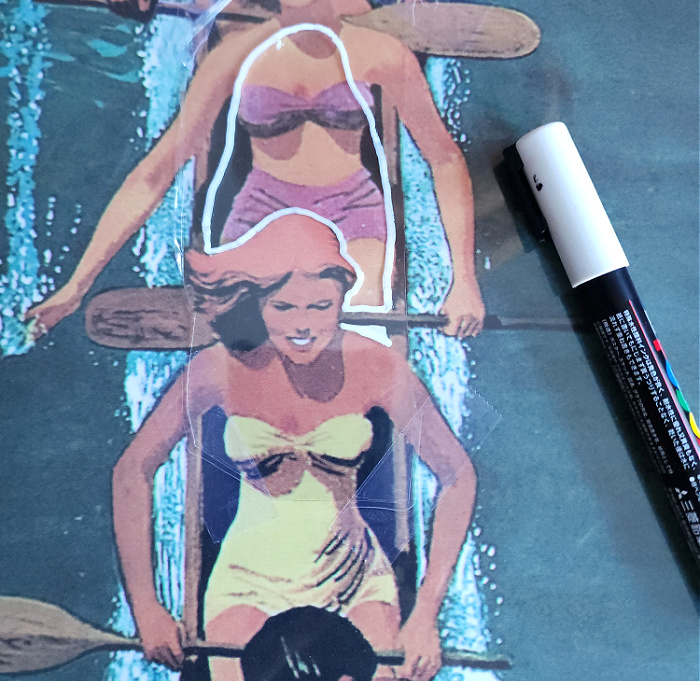
Step 3a. Use a white Posca paint pen draw the outline of the ghost onto the plastic. Tracing the ghost shape where you want the ghost to be placed. I wanted the first ghost to be sitting in the front of the canoe and made the ghost shape to fit accordingly.
Note: If a mistake is made when the Posca pen or acrylic paint is wet, quickly wash off the color and start over. Dried Posca paint can also be removed with water if you don’t like the shape of the ghost.
Step 3b. If painting more ghosts, repeat the process of the ghost outline. This is the second ghost that is sitting between the canoe paddlers. The clear plastic makes it easy to trace exactly where the ghost will fit and helps make it look like part of the picture.
Step 4. When the ghost outline has been drawn, color in the shape. Make sure to keep strokes in one direction to reduce streaks. Let the paint completely dry before drawing on the ghost eyes. Note: It may dry a bit patchy if using Posca pens.
For spray paint, do two or three light coats, making sure to let the paint dry between coats. Then, continue to step 5.
Step 5. Once the white paint is dry, use a black Posca pen or black acrylic paint to draw on the ghost eyes. Let the paint dry.
Step 6. To help prevent scratches and seal the paint, spray on a clear acrylic sealant. Let dry. Initially, I did this step after I cut out the ghost, but the scissors created scratches in the paint. So, I highly recommend sealing the paint BEFORE cutting out the ghost(s).
Cutting and Placing Ghosts
Step 7. When the painted ghost is dry, cut it out along the white edge. If needed, touch up any paint scratches.
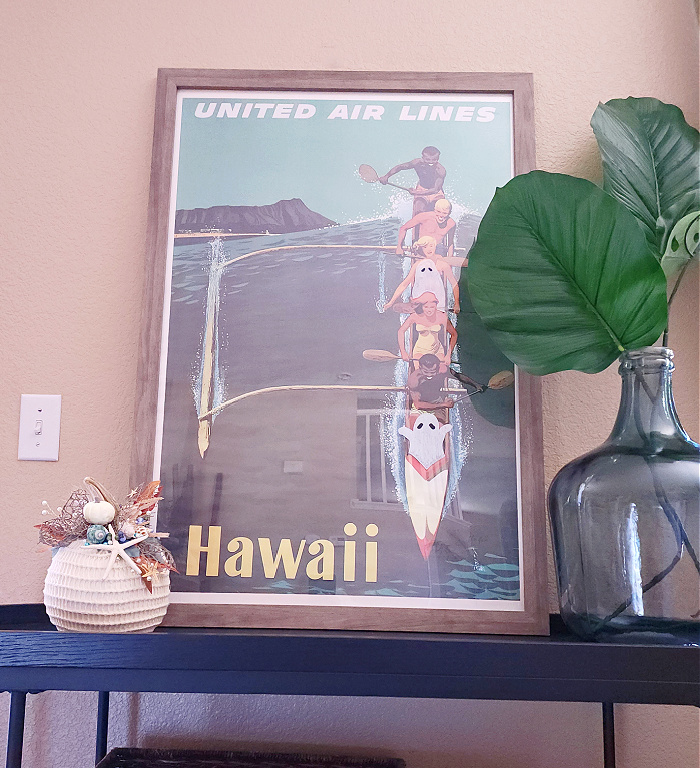
Step 8. Use tape on the back of the painted ghost to attach it to the picture glass. When all the painted ghosts have been taped on, the painting is complete!
Completed Ghost Painting
Here’s my completed Halloween ghost painting on a budget! I used what I had on hand to create a quick Halloween update and I love it! If you make a ghost painting, I would love it if you tag me on Instagram @mypinterventures so I can see your creation!
