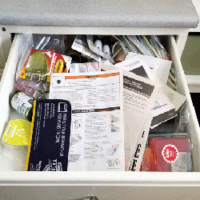
We all have them…the dreaded junk drawer. Dun…dun…dahhhhhh! My junk drawer was a hot mess, which is why I joined the April Drawer Organization Blog Hop Challenge to whip it into shape. And while it was a messy start, I followed a simple 5-step junk drawer organization to get the mess under control.

Welcome to the Drawer Organization Blog Hop! For the entire month of April, 10 bloggers will be sharing the process of cleaning and organizing one problem drawer in our homes each week. To kick off the first week, we’re focusing on drawers in our kitchen and dining rooms! This week, I’m sharing my 5-step Junk Drawer Organization, but these steps can work for any drawer in the home. If you want to join the challenge, follow along and be sure to see how each of the hosts cleaned and organized their drawers in the links below.

My Pinterventures • Intelligent Domestications
DIY Adulation • Domestically Creative • Cookies Coffee and Crafts
Domestic Deadline • Across the Boulevard • Michelle James Designs
5-step Junk Drawer Organization

Once you commit to cleaning out a drawer, give yourself at least 2 hours per drawer. It may take you less time or more, but 2 hours to sort, clean, contain, and organize is a good start. This also gives you time to put away items that don’t belong in the drawer and to decorate/label any organization containers.
Good supplies to have before starting:
- organization trays/containers
- cleaning supplies – paper towels/cloth, cleaner, vacuum
- trashcan
- label maker or paper & tape
- optional – drawer liner & scissors
- optional – donation bag
Sort

Truth be told, it gets messier before it gets better. Why? Because you HAVE TO REMOVE EVERYTHING from the junk drawer. So make sure there is a big enough area to work on, like a dining room table or floor. It’s also a good idea to have a trashcan and possibly a donation bag for items you want to give away.
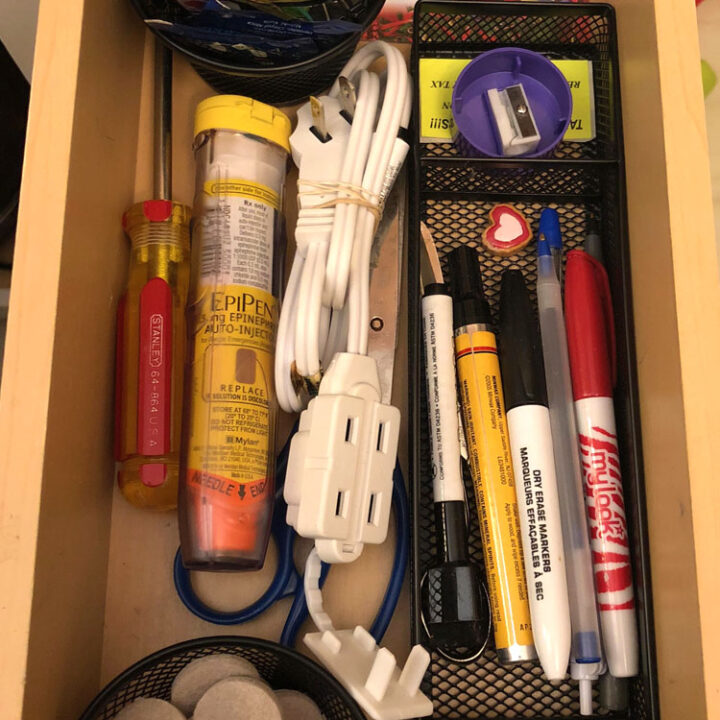
The key to sorting is to create piles of ‘like’ items. For example, group pens/pencils, batteries, screws, paper clips, and flashlights in separate piles. If you have items that you aren’t sure of, don’t linger on how to group them, just put them together in one pile and sort them again once the entire drawer is sorted. It’s likely that these items will have homes in other parts of the house or can be tossed out. If there is a large pile of items that belong elsewhere, now is the time to put them away. This will make it easier to contain and organize later on. For example, I found a TON of stuff that actually belonged in the garage toolbox and my craft room, so that’s where the items were put away before I moved on.
Purge
Items that are broken or no longer used should be discarded or donated.
Clean + Purge Again

Cleaning is where you may find some interesting things leftover in your junk drawers. I was puzzled and horrified to find my oldest daughter’s used press on nails and seeds from my youngest daughter’s garden packets left in the drawers! Needless to say, these were all tossed in the trash. I also found three garage door openers that needed batteries, which have now been put back into use.

Once the shock of what was left in my junk drawers had passed, I vacuumed and wiped the drawer and any organization containers. I reused my old drawer organizer and just gave it a good wash in the sink. Now is the time to also wipe and clean any dirty items that are going back into the junk drawer.
Tip – When the drawers and containers are clean, line it or decorate the containers with contact paper or drawer liners. This makes it easier to clean and makes the drawer nice too.
Contain

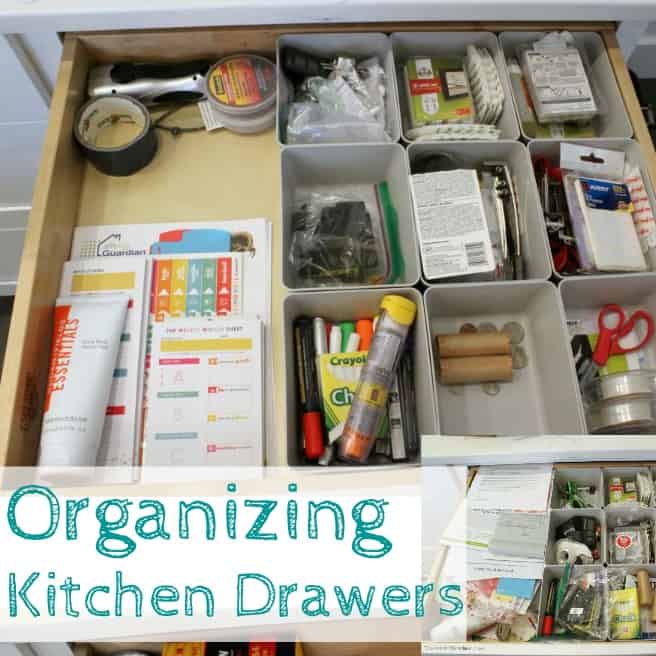
It’s time to contain those piles! Now is the time to assess the ‘like’ piles and where it needs to be contained in the drawer. I highly recommend a drawer organizer for larger items like scissors, flashlights, and batteries. Of course, you could also recycle food boxes in place of buying a drawer organizer. Then, for smaller loose items, use budget-friendly containers like empty pill bottles or gum containers for screws, picture hooks, paper clips, and stamps.

Optional – decorate the bottle caps with paper and label.
Organize

It’s almost done and we’re on the last step! Time to organize and put everything back into the drawers. The size and quantity of items you have will most likely dictate where it goes in your drawer, but try to put items that you use most often near the front. I put scissors, stamps, and pens/pencils where they can easily be reached. Things we use less often, like the battery charger, label maker, spare keys, and batteries are towards the back.
When everything has a home, label where it belongs or what is in the containers. This will help to ensure the entire family knows where everything belongs and the likelihood of items being put back in the correct spot is much higher. I used a P-touch label maker, but you could write on a piece of paper and tape the labels into place.
Tip – Use the sides of the drawers to add labels too.

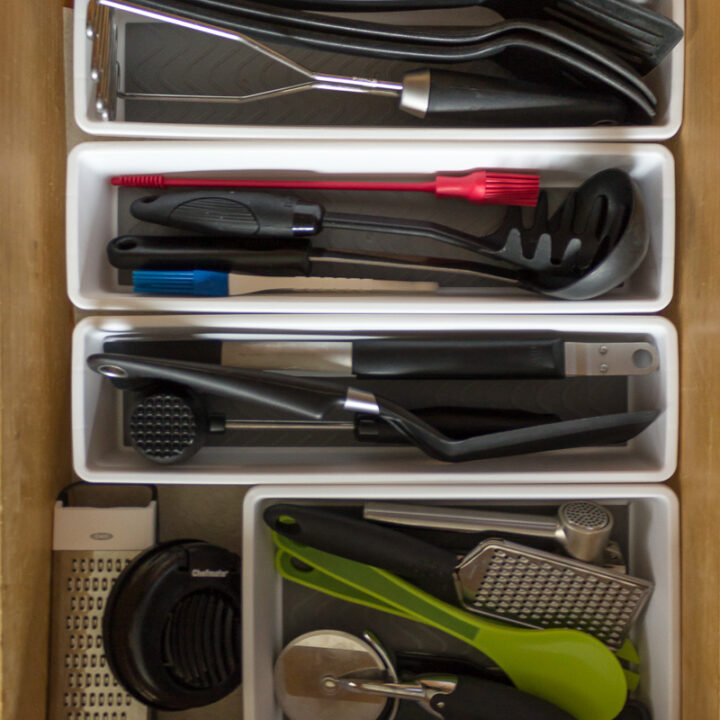
And that my friends is the simple 5-step junk drawer organization that you can apply to not only to the junk drawer, but any drawer in the house! Here’s a look at my fork/spoon drawer that I used the same 5-steps on⇓

Shop Items to Help You Organize Your Drawers
For more kitchen and dining room drawer organization ideas, visit the other host blogs below.
Organization Blog Hop Hosts - Junk Drawers


I love that u used medicine bottles that way and the way you labeled the organizer compartments!
Omgosh, I love that you labeled everything! That’s smart and would be especially great for teaching my kids where items go in the drawers. The pill bottles are another great hack! I’m already brainstorming ideas for where else in my home I could steal that idea. Your drawer looks amazing now! Great job!
Such a great Organization system! I love that you made use of the pill bottles the way you did! I’m going to steal that idea it is so great!
Jeannee
I love that you found used press on nails. That really cracked me up. The drawer looks beautiful now and very organized. I found things that needed to go into my garage and craft room too. Crazy.
It’s great to break it down into steps that are easy to follow. I love the idea of using those empty bottles for small storage. Dressing them up makes them look great, too.
I love how you clearly labeled each step you used for organizing your junk drawer. I also like how you found a use for old prescription bottles! I think I need to get a label maker now, too! Great job. Everything looks wonderful!
Love those little jar labels and your beautifully organized junk drawer! And yes, I’m always amazed at the crap I find leftover in my junk drawer after I’ve cleaned all the big items out of it. We had who knows how old taco bell sauce packets in our last house that I found when we packed up to move. SMH
I like your idea of labeling the sections! It keeps things neater. Great repurpose of pill bottles too. I like how you prettied them up too. We could use another garage door opener!! You are so right about it taking a couple hours!
Love the 5 step junk drawer process. THis drawer looks great! I need a label maker. I haven’t tackled the junk drawer yet but this is motivating. Lol I sounded the same way when I did mine…I have no idea how many time so said why & what is this?