Want to create unique ornaments that can double as gift boxes? Keep reading and I’ll show you how to make Animal Crossing balloon present ornaments!

This ornament is inspired by Nintendo Switch‘s super popular game, Animal Crossing New Horizons. In the game, there are present balloons that you can shoot down with a slingshot to get DIY cards, furniture, bells, and more. It’s such a fun game and my family loves playing it. So, I thought it would be fun to decorate this year’s Christmas tree in an Animal Crossing theme.

Before I share how to make Animal Crossing balloon present ornaments, it’s day 5 of the Festive Christmas Ideas Event! I’ve teamed up with a group of talented blogging friends to bring you a plethora of creative ways to celebrate your holiday season. You’ll find new ideas every Monday and Wednesday between Oct. 19th through Nov. 18th. Don’t forget to scroll down to find all the handmade ornament tutorials linked at the bottom!


How to Make Animal Crossing Balloon Present Ornaments
How to make Animal Crossing Balloon Present Ornaments that you can hang on the Christmas tree and put a small gift or gift card inside.
Materials
- 120mm clear fillable ornament balls (these are slightly larger than the ones found in craft stores)
- White Lidded Gift Box (Celebrate It 3.75"x3.75"x3.4" from Michaels)
- 5/8" Red Satin Ribbon
- #5 O-rings or 1/4" rubber washers
- Glue
- Spray paint - red, yellow, blue, and green
- White acrylic paint
- 1/4" Wooden dowels
- Optional - clear acrylic spray
Tools
- Scissors
- Hand drill with 1/8" bit
- Drill with 3/16" drill bit or just under a 1/4"
- Gloves
- Mask
- Sander mandrel bit
- Ruler
- Awl or ice pick
- Fishing line
- Paint brush
- Fine craft saw
- Felt tip pen
- styrofoam - used to prop up wooden dowels to dry
- optional - Hot glue gun/glue sticks
Instructions
 Open the clear fillable ornaments balls. Put on gloves and a mask to spray paint the inside of the plastic balls. Hold the the ball halves by the hanging tab to spray the inside without getting any paint on the outside. To check coverage, hold it up to the light. Spray any areas that need more coverage. DO NOT over spray to prevent any drips. Let dry and set aside for later. Optional - spray with clear acrylic coat. Let dry. Set aside.
 Cut the dowels into 3 equal pieces (4" each). Paint each piece white. Let dry and set aside. A second coat may be needed. Tip: place dowels into styrofoam when drying.
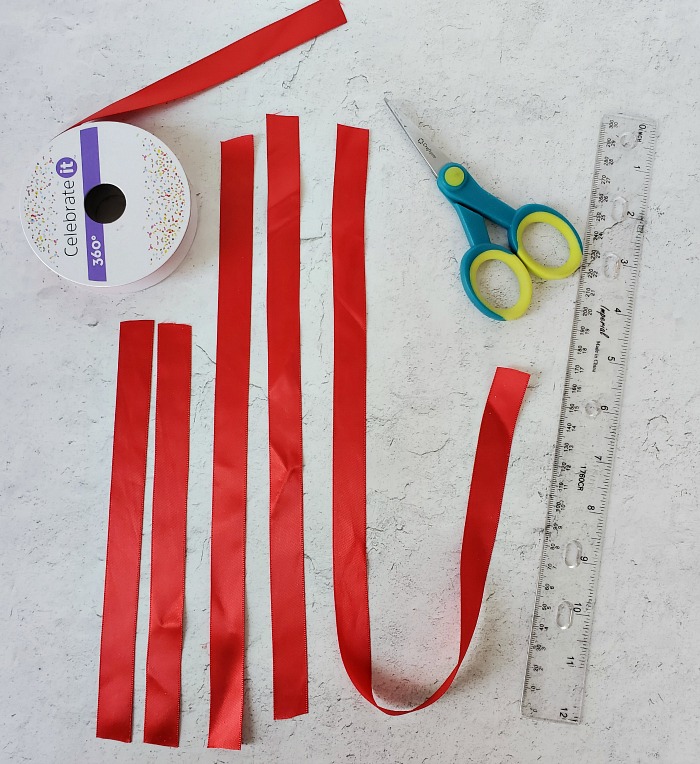 Cut ribbon. For each balloon present, cut two (2) 8" pieces, two (2) 12" pieces, and one (1) 19 1/4" piece.
 Place a bit of glue on the inside center of the present cover and place the end of the 8" ribbon on it. I just eyeballed the center, but you can measure and mark it. Bring the ribbon around the present top to the opposite side, making sure to add glue in various places to hold it in place. Next, use the 12" ribbons and do the same to the bottom of the present box. Set aside and let the glue dry. Note: Do not add too much glue. Just add enough to hold the ribbon in place.
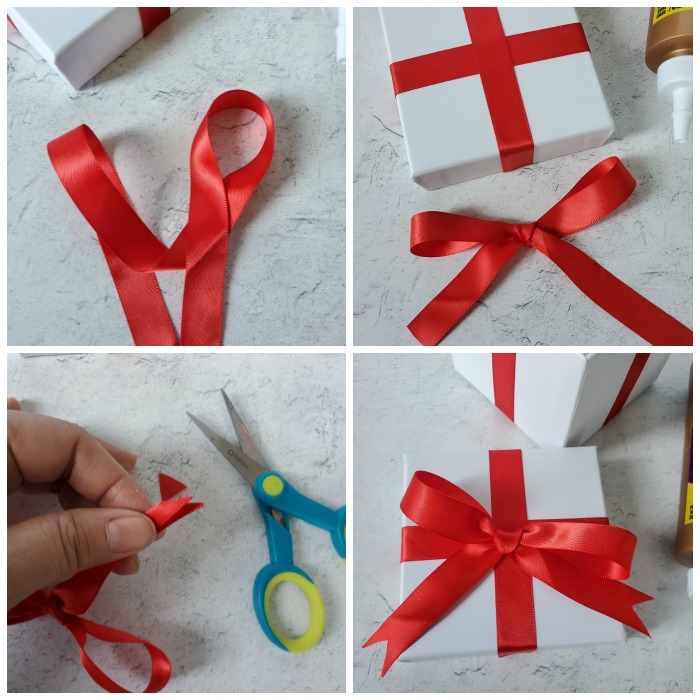 Take the last piece of ribbon and tie it into a bow. Use a dovetail cut on the ends. Set aside.
 When the ornament balls are dry, put them back together. Make sure the tabs at the top are lined up. Using string or the ribbon, run it from the top tab to the bottom and mark the center spot with a pen.
 Use a hand drill to make a hole on the center spot. This will be the starting point to drill and will help prevent breakage of the plastic. To enlarge the hole further, switch to a regular drill. Using noi pressure (let the drill do the work), start using a 3/16" bit. When it breaks through the plastic ball, switch to a 1/4" bit. Drill again till it breaks through the plastic. Note: You can skip from the hand drill to the 1/4" drill bit, but make sure to not use any pressure or the plastic will crack.
 Grab a dowel to make sure it fits into the drilled hole and the ornament ball can close. If not, use a sander mandrel bit or grinding stone bit to enlarge the hole a little at a time. Set aside. Note: Be careful not to over enlarge the hole or the ornament will be very unstable.
 When the glue on the ribbon decorated box is dry, use an awl or ice pick to poke a hole through the center of the present cover. Do this by slowly applying a bit of pressure and twisting the awl back and forth. When the awl goes through, wriggle it in a circular motion to open the hole a bit more.
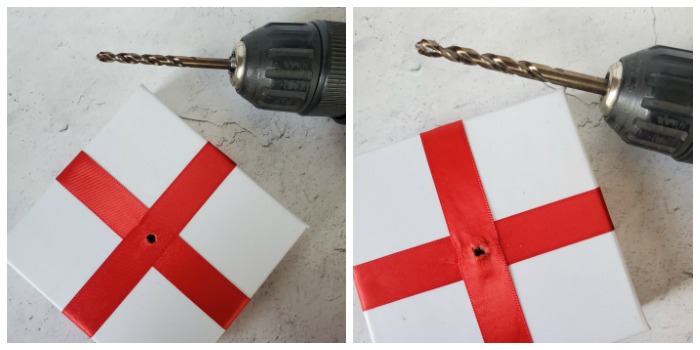 Again, using the drill and a 3/16" drill bit, enlarge the hole made by the awl. Switch to the 1/4" drill bit and enlarge the hole again. Note: there may be a bit of pulling/snagging on the satin ribbon. Just smooth it out the best you can after.
 Grab a painted dowel and push it down through the top of the present cover. Place the o-ring or washer on both ends. The rings/washer will hold the dowel in place. Place the top of the dowel into the balloon top drilled hole. Close the two halves of the ornament top, making sure the washer is on the inside. The balloon top may slide down the dowel, but it will slide back up when hung. Note: I do not glue these in place, as I want to be able to take the ornament apart for better storage. If you don't plan on taking the ornament apart, glue the washers in place.
 Place the cover with the balloon ornament onto the present bottom. Add fishing line through the top tab hole and tie into a loop. Glue the ribbon onto the top of the box.
 Optional - Add a gift card or something light inside and hang on the tree. Note: The balloon top may be a bit wobbly, but that won't matter once it's hanging on the tree.
Notes
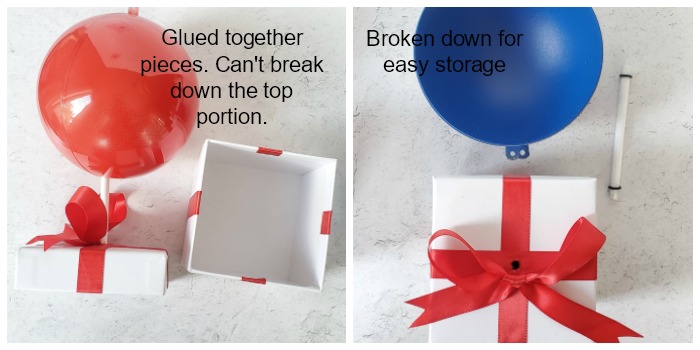 Note: the dowel can be glued in place to the present top and the inside of the balloon ornament. This will make it permanently joined together and you will not be able to take the ornament apart. I prefer not to glue these part together because it's easier to store when broken down.
 - If you can, it's cheaper to buy the washers at the hardware store.
Recommended Products
As an Amazon Associate and member of other affiliate programs, I earn from qualifying purchases at no additional cost to you. Thank you for your support.
-
 S SEEKINGTAG Clear Fillable Ornaments Ball - Pack of 12 Individual 120mm Ornaments
 -
 White Box by Celebrate 3.75" x 3.75" x 3.4"
 -
 Dowel Rod - Wood - 1/4 x 12 inches - 10 pieces
 -
 Morex Ribbon Double Face Satin Ribbon, 5/8" x 50 Yd, Red
 -
 Rust-Oleum 249124 Painter's Touch 2X Ultra Cover, 12 Oz, Gloss Apple Red
 -
 Krylon K05356807 ColorMaster Paint + Primer, Satin, Iris, 12 oz.
 -
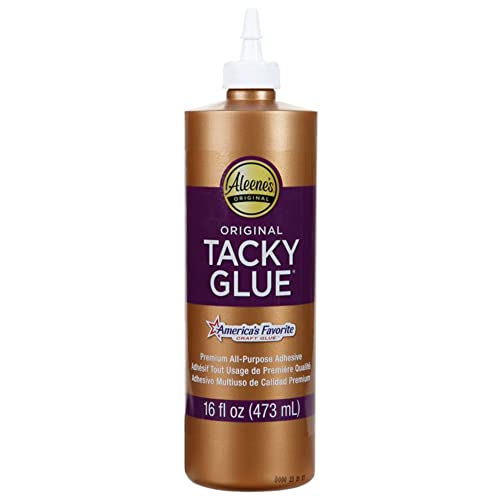 Aleene's Tacky 16 fl oz, Glue, 1 Pack, Craft Supplies, School Supplies
 -
 Apple Barrel Acrylic Paint in Assorted Colors (2 Ounce), 20503 White
 -
 Paint Brushes Set 10 Pieces Professional Fine Tip Paint Brush Set
 -
 General Tools 818 Hardwood Handle Scratch Awl
 -
 Keadic 100Pcs Electric Polishing Buffing Wheels Grinding Bits Set
 -
 Olson Fine Saw 35-550 42 tpi with Aluminum Thin Slot Miter Box
 -
 Fiskars Craft Scissors
 -
 AdTech 0453 2-Temp Dual Temperature Hot Glue Gun Full Size, White
 -
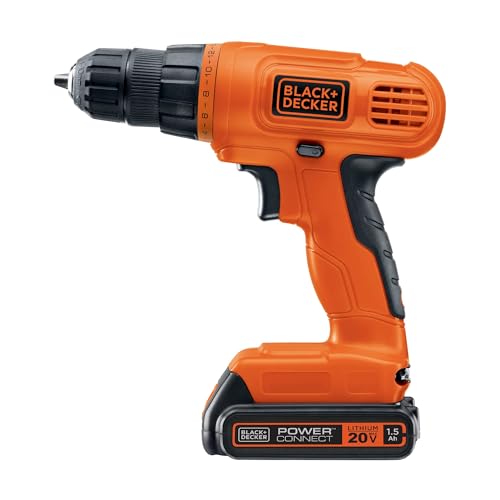 BLACK+DECKER 20V MAX Cordless Drill / Driver with 30-Piece Accessories (LD120VA)
 -
 Pin Vise Mini Drill, Hand Drill For Jewelry Making, Resin Casting Molds. Precision Resin Drill For Plastic, Wood, More
 -
 Danco #5 O ring pack
 -
 The Hillman Group 1/4 in. x 1/2 in. x 1/16 in. Rubber Washer (50-Pack)
Festive Christmas Ideas Day 5 - Christmas Ornaments
Easy Painted Wood Slice Ornaments In Bright Colors
Easy DIY Marble Christmas Ornament
Personalizing Ornaments with a Cricut | Domestic Deadline
Woodland Ornament DIY
Lettered Wood Slice Ornaments
Light Up Christmas Lantern Ornament
DIY Wood Burned Ornaments - As For Me and My Homestead
Snow Globe Ornaments From Recycled Ice Cream Lids!
Crystal DIY Christmas Ornaments
Farmhouse DIY Christmas Tree Ornament
DIY Minion Ornaments
DIY Christmas Tree Ornament: Easy Decoupage Craft
Organza DIY Embroidery Hoop Ornaments
Glittery DIY Candy Ornaments with Your Cricut
DIY Wood Slice Christmas Ornaments
DIY Pour Painted Christmas Ornaments
Disney Holiday Cookie Ornament Craft
Simple DIY Leather Christmas Ornaments
Swedish Paper Hearts
Clothespin Snowflake Ornaments
Lightweight Bauble Ornament – Free Crochet Pattern in 3 Sizes
Starfish Ornaments for a Coastal Christmas Tree
How To Make One-of-a-Kind Snowman Ornaments
DIY Wood Slice Ornaments
2020 Festive Christmas Ideas
Quick links to all the Festive Christmas Ideas on My Pintervetures.





These are awesome! I think they’d be perfect decor for a birthday party.
So cute!
Erlene, these are so clever and cute! I’m sure the kids are going to love them!
How cute are these! they would also make fun guest favors for the little ones with a little surprise inside. I’m looking forward to seeing your tree this year!
Those are cute!!