Want to gift a fun Valentine’s Day gift? Try making theseHot Cocoa Bombs for Valentine’s Day!
Ever since I’ve seen hot cocoa bombs all over the internet, I’ve been wanting to create some. I meant to make some during the holidays but never got around to making them. So, with Valentine’s Day fast approaching and the weather still a bit chilly, I thought it would be the perfect time to make some hot cocoa bombs with a Valentine’s Day theme.
Now, I’m not going to lie and say that it’s super easy to make. There is a learning curve and the first ones my not turn out so pretty, but that’s ok! Don’t give up and keep trying because it will get easier once you make the first set. And once you’ve mastered making hot cocoa bombs, you’ll be able to create hot cocoa bombs for any holiday by changing out the decorative toppings.
If this is your first time making hot cocoa bombs, let me share a few things that can make creating hot cocoa bombs easier…
What kind of Chocolate?
For the best flavor, it’s recommended to use chocolate made with cocoa butter (real chocolate). Candy melts are not the same as real chocolate. Real chocolate will be made with cocoa butter, while candy melts are made with palm and vegetable oil and has a waxy taste. Candy melts can be used to decorate the outside of hot cocoa bombs, but is not recommended for the entire hot cocoa bomb shell.
For this recipe, I used Callebaut Dark Couverture Chocolate Semisweet Callets. Using real chocolate for the cocoa bomb shell can elevate the flavor of ordinary hot cocoa into a rich and delicious cocoa drink.
If you don’t have access or time to find/order real chocolate, find good quality semi-sweet real chocolate bars with cocoa butter. Just remember that you’ll need at least 12 ounces, so multiple bars may be needed.
Should I Temper Chocolate?
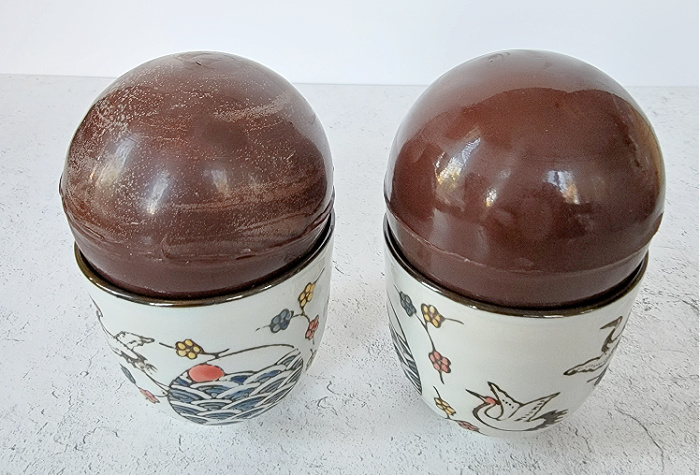
You may be wondering what and why should I temper chocolate? I’m not going into the deep science of why you should temper your chocolate, but when you melt chocolate, the bonds in the cocoa butter break and tempering helps bring those crystal bonds back together. Tempering produces a glossy sheen to the finished chocolate, helps with the ‘snap’ of the chocolate, makes it release from molds easier, and is more resistant to fingerprints.
The picture above shows the difference when chocolate is and isn’t tempered properly. You can clearly see that the improperly melted cocoa bomb (left) has spots because the cocoa fats have separated and come to the surface and the properly tempered one (right) is shiny and smooth. Now, the left one can still be eaten, but if you’re wanting a pretty presentation, tempering chocolate is the way to go.
There are several ways of tempering chocolate, but I used the easiest method, which is the microwave method. To learn how to temper chocolate three different ways, including the microwave method, watch this video >> How To Temper Chocolate Three Easy Ways!
Ingredients for Hot Cocoa Bombs
Chocolate – Callebaut Belgian Chocolate Recipe 811 or real chocolate bars
Hot Cocoa Powder – Use your favorite brand
Sprinkles – Use themed sprinkles for the occasion
Various colored candy melts or Chocodrizzler candy wafers (these can be found in Hobby Lobby for under $2)
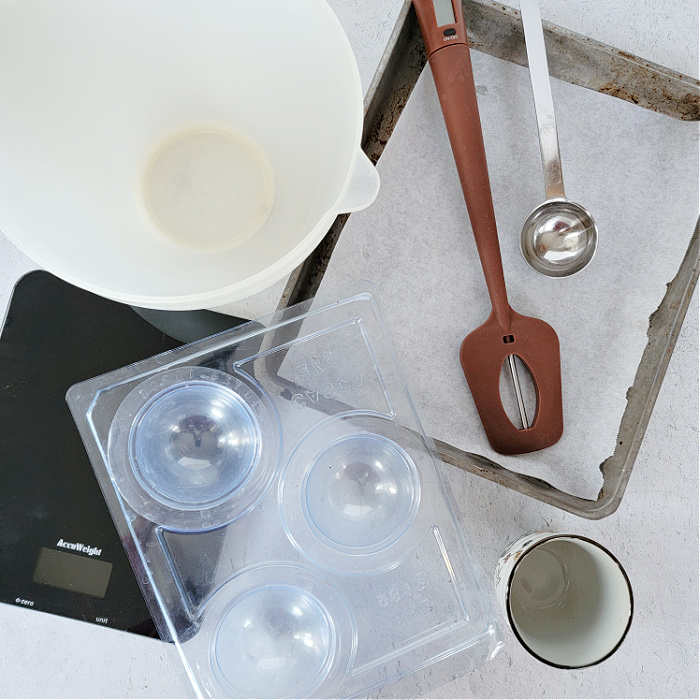
Tools for Hot Cocoa Bomb
70mm Hot cocoa bomb mold(s) – If making multiple bombs, I suggest buying at least two molds or more. 70mm cocoa bomb molds will easily hold 2 T. of cocoa + mini marshmallows. This is a 3-piece mold and does not require you to brush the chocolate into the mold. It’s a pour and smash type mold, which is simple to use and produces smooth surfaces on the the outside and inside of the hot cocoa bombs.
Thermometer – I used this all in one spatula and thermometer to monitor the temperature of the chocolate.
Bowl(s) – Plastic or silicone bowls to melt chocolate or candy melts in.
Tray – Place cocoa bombs in lined tray to decorate.
Parchment paper – Line trays for easy clean up.
Tablespoon – Use to add hot cocoa mix to cocoa bombs.
Scale – to help measure out chocolate
Spoons/Forks – If using candy melts for decorating. Use to mix and drizzle candy melts.
Small cups or cut paper towel cardboard rolls – Use to hold cocoa bombs during assembly.
Ceramic plate (not shown) – used to melt and even out edges of cocoa bombs.

Hot Cocoa Bombs
How to make hot cocoa bombs for Valentine's Day or any other holiday.
Ingredients
- 12 ounces real chocolate (Callebaut belgian chocolate), chopped in small pieces
- hot cocoa mix
- 1 bag mini marshmallows
- various sprinkles - themed for the occasion
- various colored candy melts
Instructions
 Prep hot cocoa bomb mold by separating the pieces. Set aside. If using a silicone mold, have a brush ready too.
 In a plastic or silicone microwavable bowl, add 12 ounces of chopped chocolate. On high power, heat for 30 seconds. Stir vigorously. Heat for another 20 seconds and stir virgorously. From here, do a 15 second burst and stir. If most of the chocolate is melted, keep stirring until all the bits are melted. Check the temperature of the chocolate and make sure it does not go above 90°F. If the chocolate is still not all melted, do another 6-10 second burst and stir until the chocolate has melted. Again, check to make sure the chocolate stays between 88°F to 90°F.
 Pour chocolate into hot cocoa bomb mold. The one I'm using has a predetermined line on how much chocolate to use. Once the chocolate is added, there is a pliable plastic insert that goes over the chocoolate.
 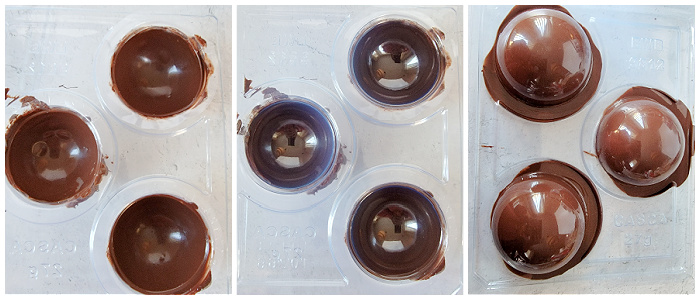 Push the insert in until the chocolate comes to to top of the mold. Place the last piece of the mold on. Finally, flip the entire mold over and push the round molds down until the chocolate comes all the way down to the edge of the molds. It's ok if some of it spills over as this will ensure the molds are completely filled and will create a nice edge. Place in the fridge for 20 - 25 minutes to let the chocolate harden.
  When the chocolate is set, remove from the mold. If set properly, the chocolate should easily pop out of the mold. Flip the chocolate half circle over, keeping the pliable insert in, and gently break off any excess chocolate around the edge. Place unmolded chocolate onto a place for assembly. If making a large amount of cocoa bombs, make all the chocolate halves first, so the assembly and decorating can be done all at one time.
 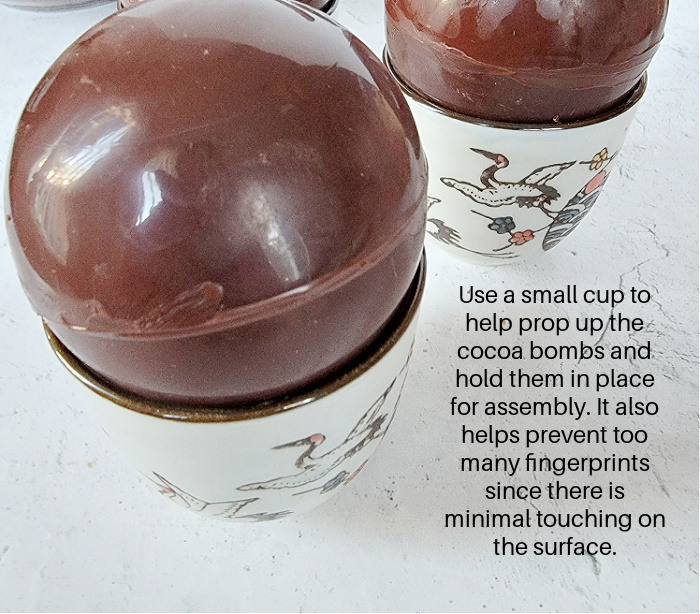 To prep for assembly, get a tray lined with parchment paper ready. Set aside. Get small cups or cut paper towel cardboard rolls into 1 1/2" lengths ready. These will be used to prop the chocolate bombs up during asssembly. Basically, use anything that can prop up the cocoa bombs up off the work surface.
  Warm a ceramic plate in the microwave for about 1 minute 30 seconds. Place one of the chocolate half circles, edge down, on the plate and swirl around. This will melt and even out any rough edges to create a straight and smooth edge to join with another half.
  Place the cocoa bomb half onto a prepped cup and fill with 2T. hot cocoa mix and mini marshmallows. Repeat melting the edge of another chocolate half and place over the filled half. Run your finger around the edge to clean off any chocolate that has spilled over. Move to the parchment lined tray for later.
 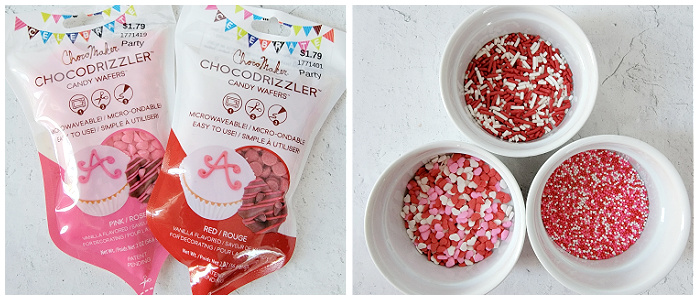 When all the hot cocoa bombs are assembled, prep the decorative toppings. For these, I used Chocodrizzle decorative melts for convenience (find at Hobby Lobby, craft store, or Amazon). Just follow the directions on the bag to melt and drizzle over the prepared plain hot cocoa bombs. If using regular candy melts from a bag, follow the directions on the bag for melting.
 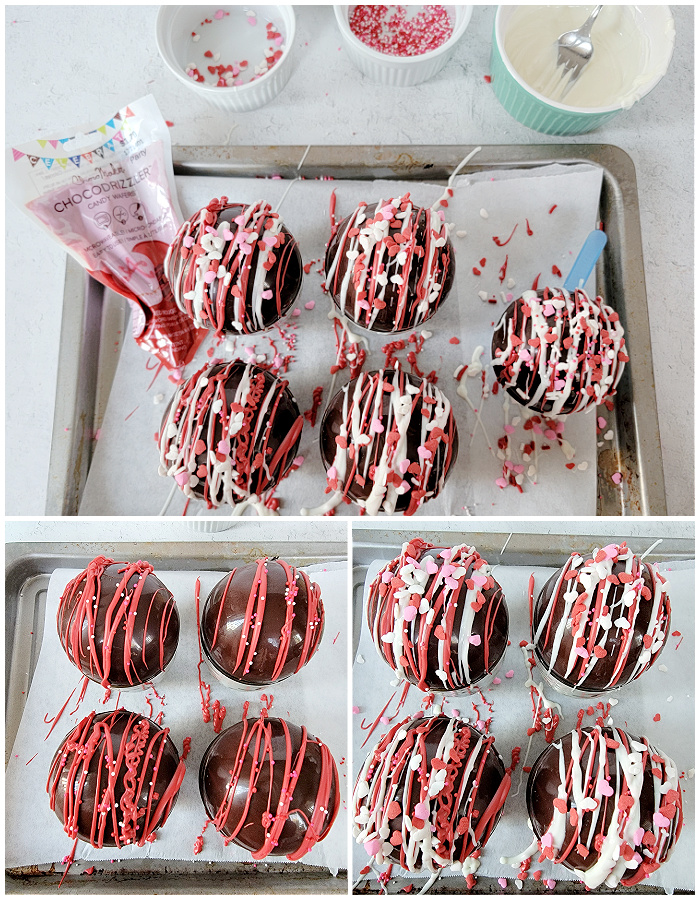 Drizzle melted candy melts over the hot cocoa bombs and immediately spinkle on toppings before it sets. Let side for 15 - 20 minutes or until candy melts are hardened.
 - To serve, place a cocoa bomb in a large mug and pour 1 1/4 to 2 cups of hot milk over the cocoa bomb. Amount of milk will depend on how sweet you like your cocoa (I like 2 cups of milk). For 2 cups of milk, you will need a large oversized mug. See video.
Notes
If gifting, place in large cupcake liners and pack in a gift box. These can also be packed in cellophane bags or placed in a mug and cellophane wrapped.
Recommended Products
As an Amazon Associate and member of other affiliate programs, I earn from qualifying purchases at no additional cost to you. Thank you for your support.
-
 Callebaut Belgian Dark Couverture Chocolate Semisweet Callets, 54.5% - 5.5 Lbs
 -
 Norpro 3 Piece Silicone Bowl Set, Red, 6.5 x 6.5 x 6.2 inches, As Shown
 -
 Bundle of Wilton Candy Melts, Red and Pink, 12 Ounces Each
 -
 Manvscakes | Valentine sprinkle pack | Red and pink sprinkles | Heart sprinkles | Valentines jimmies | Baking






After such a recipe you are a sunshine for me! These are the best cocoa bombs I’ve ever eaten.
Glad you liked it.