Last month was so crazy busy that I took a break from last month’s Craft Room Destash Challenge. Now that things are calming down, I’m once again joining the challenge with an easy Summer Sea Watercolor Background Art.

If you aren’t familiar with the Craft Room Destash Challenge, it’s a monthly challenge for craft and DIY bloggers to create a new craft or project from their own stash of goodies! The only rule is to not spend more than $10 for additional supplies to finish the craft. And I’m glad to report that I spent ZERO dollars for this month’s Summer Sea Watercolor Background Art and only used supplies I already had on hand!
[Tweet “Create easy art – Summer Sea Watercolor #craft #fun #kids #CraftRoomDestashChallenge”]
Summer Sea Watercolor Background Art
Before I share this Summer Watercolor Art project, I want to state that I am not a watercolor expert. I’m telling you this because I don’t want you to be intimidated by this project. Even if you’ve never painted with watercolor, YOU CAN DO THIS!

Supplies:
- Watercolor paper to fit your frame
- Paint brushes
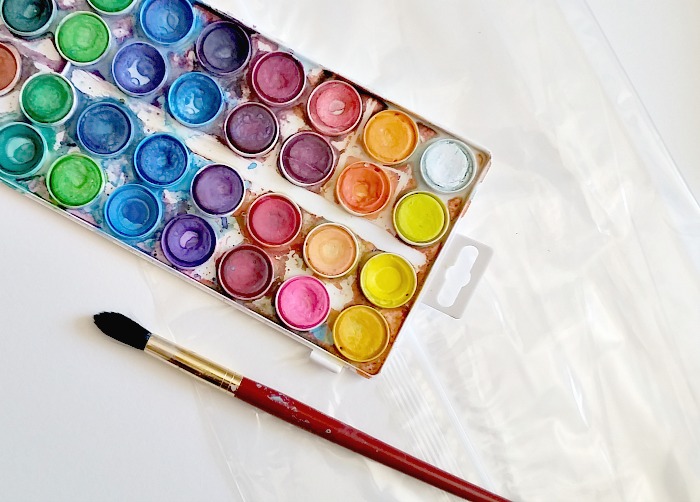
- Watercolor paint
- Containers for water
- Plastic bag (Ziplock type bag)
- Water bottle
- Hair blow dryer (optional)
Optional supplies for quotes:
- Black felt pen
- Watercolor pencils
- Hot glue gun/glue sticks
- star fish/shells
How to:
- Brush water all over the entire paper.
- Add various shades of blue and green onto the paper. Continue to add color until you get a pattern you like.
- If the paper seems too dry, don’t be afraid to add more water to the paper to allow the colors to ‘bleed’ a little.
- If the paint has dried, spray with water.
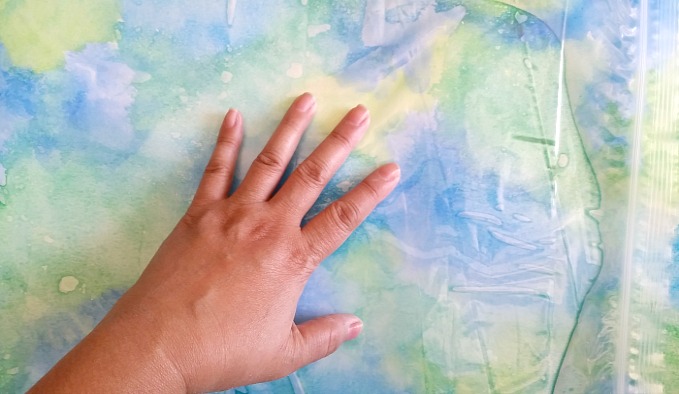
- Place the plastic bag onto the painted paper. Rub your hands over the bag from the center out towards the outside edge of the paper. My daughter cuts open the bag to have one layer of plastic, but I leave the bag ‘as-is’ in case I want to use it
- Remove the plastic bag. If you like what you see, let the paint dry. Otherwise, add more color or replace the bag over the paper and smooth out again until you get the look you like.
- Let the paint dry or if you’re impatient like me, use a blow dryer to dry the paint.
- Optional – I added some splatters of blue paint to add more interest.
- Apply a mat, set in a frame, and it’s ready to hang!
Optional ~ Summer Sea Watercolor Quote and Decorating
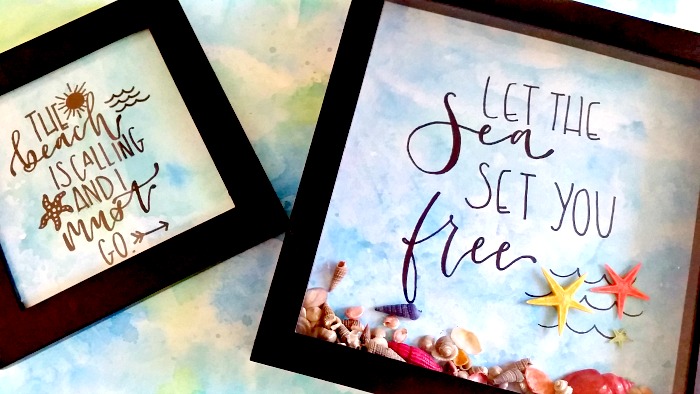
Okay, this is where I enlisted the help of my two teen daughters. They are talented in the trendy hand lettering, so I let them write the quotes and I added the drawings and shells.
- Write a quote and decorate.
- Change things up and cut the edges of the paper.
- Draw a fun summer image, paint, and outline with permanent black pen.
If you’d like to join in the Craft Room De-Stash Challenge, you can request to join our Facebook group here!


Pinned for my daughter to try! She would especially like the pineapple one. Thanks for sharing on the Virtual Fridge!
I love the ones all decorated with sayings; I bet I could even use my Circut and some vinyl to do that part for me. Thanks for sharing your idea with us at the Virtual Refrigerator. Pinned.
Hey, Erlene! Just wanted to let you know that we loved your Summer Sea Watercolor Background Art so much when you shared it at the #HomeMattersParty last week, we’ve FEATURED it THIS WEEK! Hope you can check it out when you get a sec. Happy Friday!!!
http://lifewithlorelai.com/2017/06/29/home-matters-linky-party-142/
~Lorelai
Life With Lorelai / Home Matters Linky Party
OMG, I used to do this with my mom’s watercolor paper scraps when I was a kid. I totally forgot about this. I love how you used this as a background
This is so much easier than I thought! Your backgrounds turned out beautifully and your girls did a great job on the lettering. I see lots of watercolor crafts in my future!
What a fun painting technique. I love how it looks like water. This would look perfect in our powder room. Now I just need to find a quote I love. Thanks!
Thank you for this tutorial. The idea to try out water coloring is circling in my head for quite a while now. I think I might just hop on that train, get the supplies and start exploring this new skill…
These are beautiful. I love each and every one of them.
Thanks for breaking it down on the watercolor. I got watercolor supplies for Christmas and I’m ashamed to say I haven’t even touched them yet….I’m sensing a Craft Destash challenge coming up for me I love how these turned out. Your daughters did a great job on the lettering
Thank you so much for the inspiration….you make it look so easy!
What a neat way to add an interesting background to framed art! I haven’t used water colors since I was a kid, but I think I need to try it out again.
This is terrific. Love how you showed all the steps. I am so going to try this. Pinning.
I love the soft swishes of color! How pretty! -Marci @ Stone Cottage Adventures
I love all things watercolor, these look great! Perfect for a fresh summer vignette or gallery wall. I think the pineapple is adorable Thanks for sharing, pinning now