To celebrate spring and craft month, I’m sharing a fun dollar store hanging spring fairy garden terrarium balls.
Wait, should these be called a gnome garden or fairy garden? Hmmm… Well, upon looking up the definition of a fairy garden, which is any small garden scene with fairy tale creatures, it seems these terrariums are indeed considered fairy gardens! Anyway, now that this craft has been verified as a fairy garden, let’s move on.
Fairy gardens make a wonderful way to relax and create your own fantasy garden. You don’t need a green thumb (unless you want to add real plants) and it takes less than a day to create a mini garden scene. It’s a budget-friendly spring relaxation craft for both adults and older kids. Note: Since this craft uses glue guns, it’s geared towards older kids and adults. Younger kids can make these, but only with adult supervision and help with items that need to be applied with the hot glue gun.
Hanging Fairy Garden Terrarium Ball Supplies
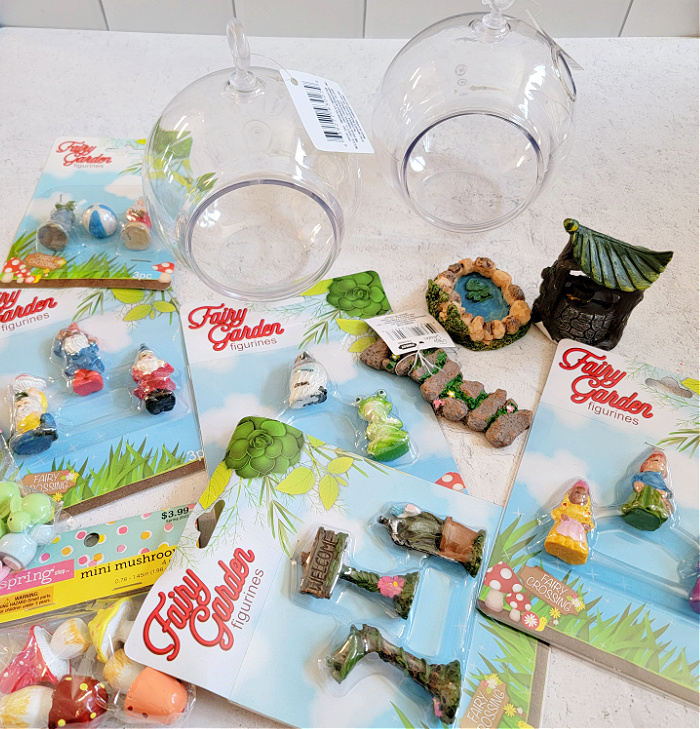
The majority of the supplies for these hanging fairy garden balls came from the Dollar Store, so it’s a budget-friendly spring craft. A few items, like the large mushrooms and moss mat came from regular craft stores.
- 4.5″ plastic terrarium balls – from the Dollar Store
- Various fairy garden figurines – from the Dollar Store and Hobby Lobby. Dollar Store figurines come three to a pack. Other Dollar Store fairy items can be bought individually.
- Various floral decorations (optional) – I used small mushrooms and red berries.
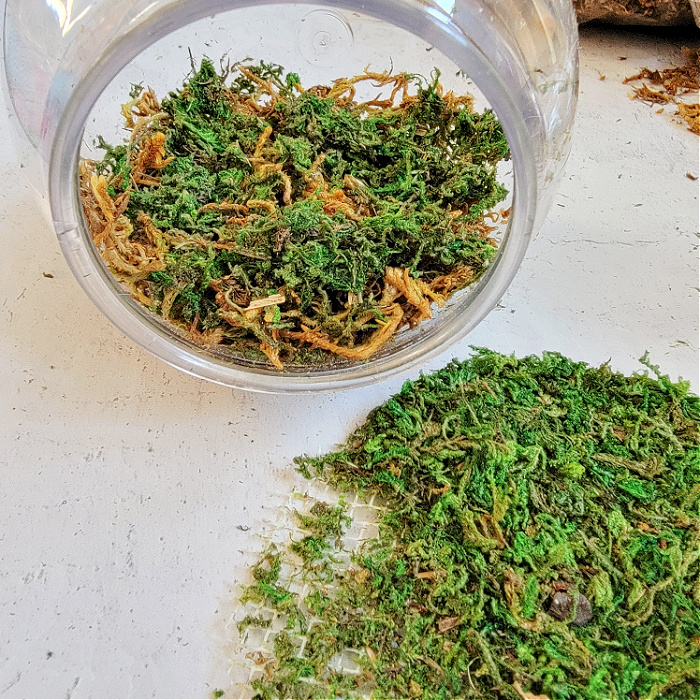
- Moss – I used two different colors, but it’s fine to use one. One was a dull loose moss and the other was a bright green moss mat.
- Glue gun/glue sticks
- Craft glue
- Rope/twine – I used brown polished hemp rope
- Various beads (optional)– to decorate hanging rope
- Small twigs (optional) – to decorate the outside opening of the fairy ball. Go outside and gather some up from the yard or park.
- Scissors
- Paint brush
- Acrylic paint – optional if you want to change the color of some of the decorative pieces.
- Protective eyewear – if cutting floral wire goods.

Hanging Fairy Garden Terrarium Balls
How to make DIY hanging fairy garden balls. Video instructions at the end of the written tutorial. Most of the supplies are from the Dollar Store with some from regular craft stores. Fun and budget-friendly spring craft.
Materials
- 4.5" plastic terrarium balls - from the Dollar Store
- Fairy garden figurines
- Moss
- Optional -Moss mat
- Rope/twine - I used brown polished hemp rope
- Optional - Various mini floral decorations, like small mushrooms and red berries
- Optional - Various beads to decorate hanging rope
- Optional - Small twigs to decorate the outside opening of the fairy ball. Go outside and gather some up from the yard or park.
- Optional - Acrylic paint if you want to change the color of some of the decorative pieces.
Tools
- Scissors
- Hot glue gun/glue sticks
- Craft glue
- Paint brush
- Optional - protective eyewear
- Optional - long tweezers
Instructions
 Wipe any fingerprints or dirt off the plastic terrarium. Add a good amount of craft glue to the bottom of the terrarium. Use a paint brush to spread the glue to cover the bottom and about 1/2" up the sides.
  Take a bit of moss and place it on top of the glue. Press down. Zigzag a ribbon or more craft glue on top of the moss. Add another layer of moss on top of the glue and press down. Repeat this once more time or until the height of moss you like is achieved.
  Optional - I used two different colored moss for interest. I scrapped off the bright green moss from a moss mat and glued it over the bed of dull moss.
  Decide what fairy garden figurines you want to use. Dry-fit the items before gluing any items into place. If you want to repaint or need to trim floral items (keep at least 1/4" of wire at the bottom), do it now. Wear eye protection when cutting wired floral items as the wire can sometimes fly at your face. Note: if you want to repaint the fairy figurines, it's best to use small detail brushes.
  Once the placement of the items is decided, use the glue gun to set the items in place. Add just enough glue to keep items in place. For heavier items, use the back of the terrarium to help prop them up. For example, the 'welcome' signpost is glued to the moss and a tiny bit of hot glue was added to the back of the post, which is propped against the back of the terrarium.
  Optional - To decorate the outside of the terrarium, add a good amount of glue around the opening and opening rim. If needed, use a paint brush to help spread the glue around.
  Tip: use scissors to cut moss pieces into smaller bits. It makes application easier around the outside of the terrarium.
  Optional - Once moss is added to the outside rim of the terrarium, glue on floral decorative items and small twigs.
  Cut twine or rope in the length needed for hanging. Optional - add decorative beds to the twine. Tie ends of twine and hang!
Notes
Note: the items inside the terrarium may move around while the glue is still wet. Items will become sturdier once the glue is dried. Because this uses hot glue, it is not recommended to be hung in open or uncovered areas. It's best for the hanging fairy garden balls to be hung in a covered and sheltered area.
Recommended Products
As an Amazon Associate and member of other affiliate programs, I earn from qualifying purchases at no additional cost to you. Thank you for your support.
-
 Dollar Tree 4.5" plastic hanging terrarium
 -
 Hanging Ornament Terrarium Plastic Clear Globe - DIY Crafts Transparent Ball with Circle Opening & Hanging Loop - 4.5 Inches
 -
 BBTO 400 Pieces Multicolor Artificial Holly Berries Christmas Fake Fruit Berries on 200 Pieces Wire Stems for Christmas Tree Decorations Wreath Craft Use Wedding Party Favor
 -
 senlinlv 50Pcs/Set Mini Foam Mushroom Artificial Plant Flowers for Wedding Home Party Decoration DIY Micro Landscape Gift (Colorful)
 -
 Hot Glue Gun, Cobiz Full Size (Not Mini) 60/100W Dual Power High Temp Heavy Duty Melt Glue Gun Kit
 -
 Fiskars Craft Scissors
 -
 Aleene's 17843 Quick Dry Tacky Glue 8oz
 -
 Fairy Garden Resin Gnome Accessories Kit Miniature Garden Resin Gnomes Decorations Micro Landscape Ornament Set Dwarfs Statue for Fairy Gardens Decoration
 -
 Bean Products Hemp Twine - High Tensile Strength and Durable - Made with 100% Hemp - Perfect for Jewelry, Arts & Crafts, Decoration, Cooking - 1MM, 100G/430 Ft. - 20 lb. Test Strength - Black
 -
 Dracarys Selected 100 Pieces Fairy Garden Accessories, Fairy Garden Kit, Fairy Garden Animals, Miniature Figurines, Micro Landscape Ornaments Kit, Garden DIY Kit, Environmental Resin


Love your idea! thanks your sharing 🙂
Love your idea. Thanks for sharing.
I really like this idea! Thank you for sharing such a detailed instruction with the tutorial video. It’s easier for me to follow!
LOVE these!! Thanks so much for sharing!! Great tutorial!!!
Hugs,
Deb
Thank you. Glad you liked it. I love making fairy gardens 🙂