Need an inexpensive, quick, and easy boredom buster project for summer? Try growing Borax crystals!

My youngest daughter is obsessed with geodes. She loves picking unopened geodes and watching them cut open to reveal the mineral formations inside. Her most recent geode was cut at the San Diego county fair. It’s gorgeous and the shop owner offered her more than double what she paid to keep it. Of course, my daughter kept it and now has it displayed in her room. I used half of her geode as a prop for my DIY Borax Crystal Necklace tutorial.
My daughter’s growing geode collection is beautiful. I mean, who can resist the sparkling quartz mineral growths? Unfortunately, buying geodes can be a pricey hobby and you aren’t guaranteed a nice inside.

Luckily, growing Borax crystals is easy and you’re almost always guaranteed a beautiful result! It’s an inexpensive way to get the look of the inside of a high end geode. And I think most kids have grown some type of crystal as a science project in school. If they haven’t made crystal in school, this would make an awesome family fun project (see warning below). Crystals can be grown using salt, alum powder, sugar, Borax, and more. I chose Borax powder because I had a whole unopened box in my cupboard, so that’s what I went with!
Warning! Borax is harmful if ingested, inhaled, or gets into the eyes. It can also cause a skin rash in some people. This project should be done with adult supervision at all times. If you are concerned with the use of Borax, try growing salt or sugar crystals instead.

Growing Borax Crystals
How to grow small and giant Borax crystals.
Materials
- Borax
- Water
- Chenille fluffy stems or pipe cleaners
- Fishing line
- Stick or object to tie fishing line onto
- Food color
- Something to place over the jar opening - towel, oven mitt, cardboard, etc...
- Clear gloss sealant
Tools
- Scissors
- Pot
- Large 3 cup+ heat proof glass jar
- Spoon or mixing utensil
- Measuring spoon
- Measuring cup
Instructions
- In a pot, bring least 5-6 cups of water to a boil.
- Don't over think this part. While the water is heating, take a fluffy chenille stem and shape into a circular or oval shape. It's ok to have a bit of space between the stems as crystals will cover the area. To reinforce the shape, weave more of the chenille stem perpendicular to the circular shaped chenille stem.
- If you want a flat crystal formation, leave the chenille base flat. If you want a curved formation, gently shape it into a shallow curved form. Note - make sure the chenille form is small enough to fit inside the mouth of jar with ample room on all sides for crystals to grow.
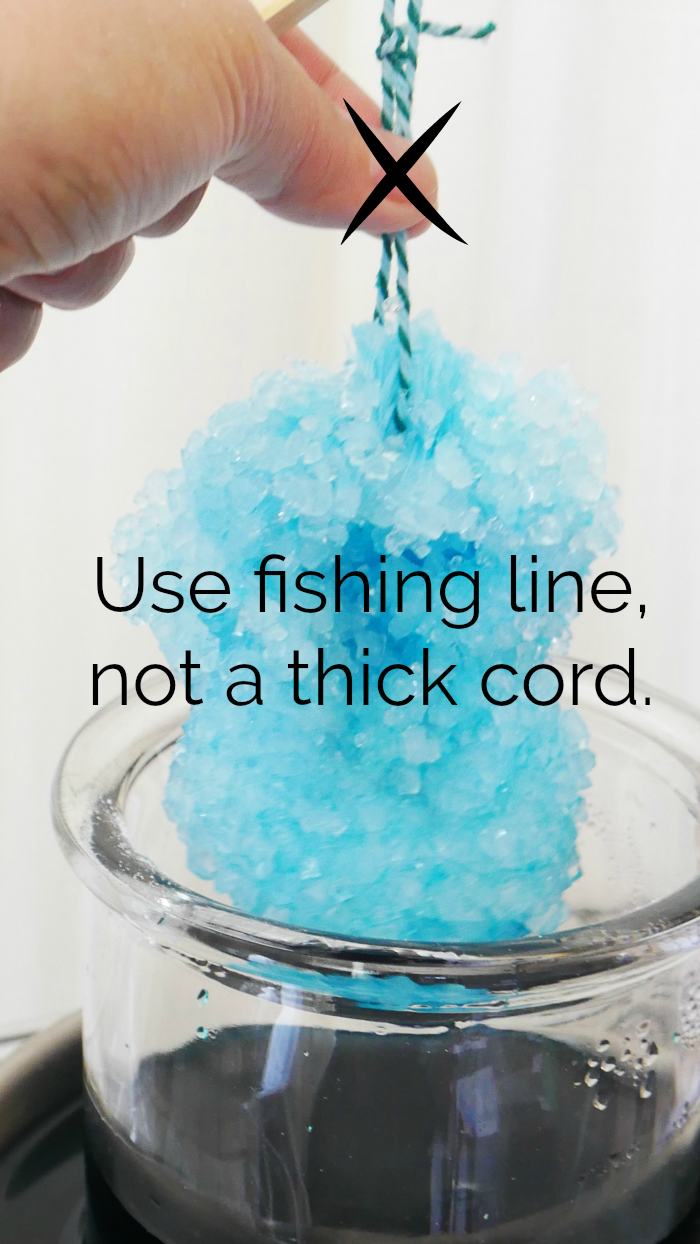
- Tie fishing line onto one end of the chenille form and the other end on the stick. Make sure the line is short enough to keep the chenille form off the bottom of the jar. Note - I initially used baking string, but it was difficult to remove when crystals formed. Fishing line is thinner and can't be seen when cut.
- Adults only - When the water has boiled, add 2 cups to the jar. Add in 6T. of Borax or 3T. per cup of water. Mix to dissolve. Continue to add 1 tsp. of Borax at a time until no more Borax will dissolve. We're trying to supersaturate the water. Optional - Add gel food coloring or regular food coloring to the mix till you get the desired color.
- Place the chenille base into the middle of the jar. Place a small towel or cardboard to cover the jar opening and leave alone for at least 5 hours. Optional -Place the jar in the pot with the leftover hot water. Cover and leave alone for 6-7 hours.
- Check crystal formations after 5-6 hours. If you are satisfied with the formation, cut off the fishing line. Place on a paper towel to dry indoors. If you want more crystal formations, leave in the solution longer.
- When the crystal formation is completely dry, seal with a clear gloss sealant to help maintain crystal color.


Hello – i recently started to try to make borax crystals.. I’ve watched several Youtube videos and went through your instructions as well. I used pipe cleaners trying not to leave big gaps. I left my crystal in the borax solution for close to 18 hours. it wasn’t filled in very good, and then I decided that i would add more color too. I heated up the solution again, added more borax and submerged the crystal again, this time for about 12 hours. I took it out to dry but noticed that really dense crystals were on the bottom half. I am wondering if I can re-submerge in a new borax solution to try to get better coverage? (sorry for the long comment.)
Yes, you can submerge the crystal in new solution to get better coverage. I submerged this Borax crystal back into the solution to fill in parts that where pulled off by the string.