This post contains affiliate links. Purchasing items using these links may result in a small commission that helps run this blog. Thank you!

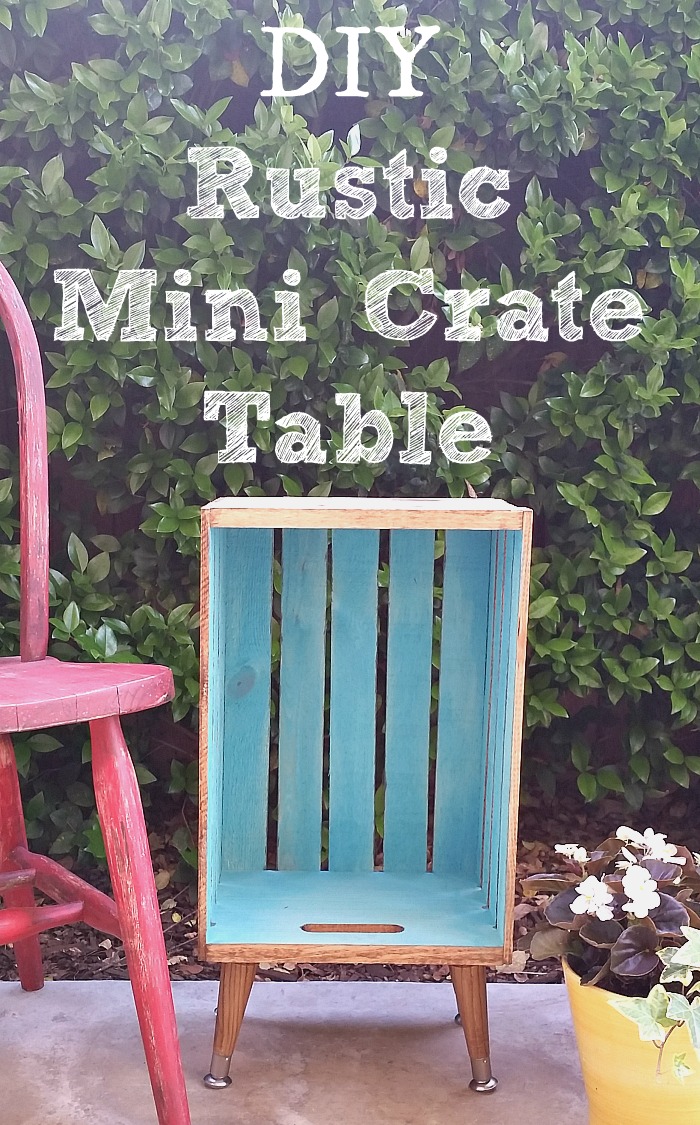
Thanks for joining me! Today, I’m sharing my DIY Rustic Mini Crate Table. If you’ve been following along for the past few weeks, you know that I’ve been giving my front door area a mini makeover and this table was the perfect addition.
DIY Rustic Mini Crate Table
Supplies:
- wooden crate (Michaels)
- paint brush – large and small
- water & bowl
- paint (I used Folk Art aqua acrylic paint)
- Danish oil in dark oak (Lowes)
- rag/paper towels
- painter’s tape (optional)
- 4 wooden legs (Lowes)
- 4 angled leg plates (Lowes)
Directions:

Since I was creating an outside rustic table, I chose not to sand it and carefully applied Danish oil to the outside of the crate. To apply the Danish oil, I used a large paint brush for the large areas and a small brush that was about the width of the wood sides or just slightly larger than 1/4″ wide. Once all the oil was applied, I made sure to wipe off any excess stain with a rag and let the Danish oil dry before painting the inside of the crate.
Tip 1 – If you plan on putting this indoors, make sure to sand the entire piece to remove any rough areas.
Tip 2 – If you are a perfectionist, place tape along all the inside edges of the crate. This will prevent the stain from bleeding onto the inside of the crate.

While the crate is drying, I used a rag to apply Danish oil to the wooden legs.

In the picture above, you can see a little stain bleed on the inside of the crate and this is where you would want to place painter’s tape. I kind of did this on the fly and skipped that step.
Since I was going for a rustic look, I didn’t want a full saturation of color and watered down my paint. I used a full 2 oz. bottle of paint and added water until it looked like colored water. Then, I painted the inside of the crate, being careful not to get any on the stained portion. If some of the paint spilled over onto the stain, I quickly wiped it off with a damp cloth.

Once the paint was dry, I added the legs to one of the small sides of the crate and the table was done! I’m one step closer to a finished mini front entry makeover.


I would have never thought to turn a wooden crate into a cute end table! Thanks for the idea and instructions. You make a good point about remembering to sand any rough edges before painting. I think I’ll add a few little shelves to my crate as well!
Hey Erlene! The rustic crate turned out great and it looks really easy! Another tick mark on the success column! Thank you for linking up at Funtastic Friday!
Thanks so much Lacie. It was such an easy project and fun too.
This is such a great idea! And so easy, too! I love the color you chose and the legs are perfect as well. Great job! Thanks so much for stopping by Inspiration Thursday. Hope you have a great week!
Thanks Lela. I think the color really helps the table ‘pop’ and legs give it a more modern look.
Such a super cute outdoor table! I totally want to make one of these for our deck. Pinning!
Thanks Marie. If you make some, tag me on Instagram. I would love to see them.
I love how this turned out!! Such a cute little outdoor table and it goes great with that rustic chair. Pinned!
Thanks Amanda. I love how it turned out too.