Stenciled Embroidery Hoop Ornaments – 2016 Ornament Exchange & Blog Hop
 Welcome to the 2016 Ornament Exchange & Blog Hop! This year, there are 11 pairs of partners or 22 talented ladies participating in the exchange. The rules of the challenge were simple – create a handmade ornament for under $15 to exchange with a partner and create a tutorial to share on the blog hop!
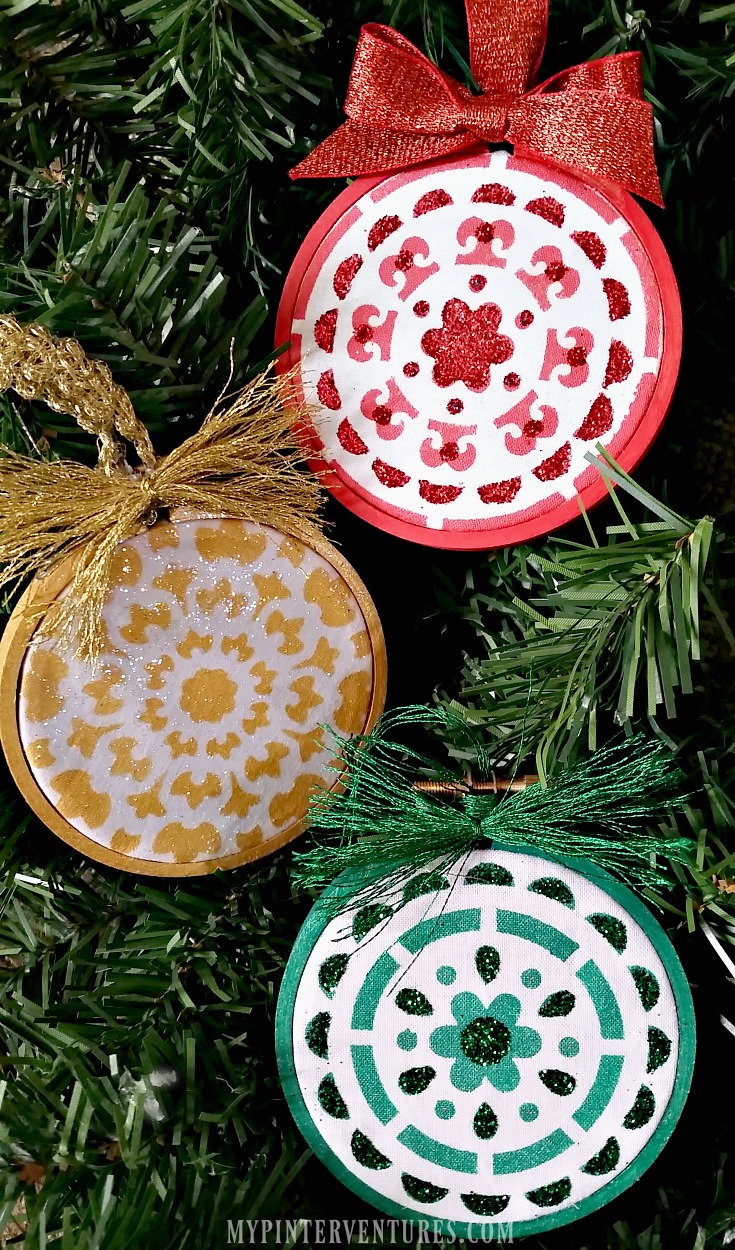
My partner was Terri from Christmas Tree Lane, who decorates with traditional Christmas colors of green, red, gold, and lots of sparkle. Since I love traditional colors and bling too, I couldn’t wait to create an ornament for her. In fact, I had so much fun that I created a few ‘Stenciled Embroidery Hoop Ornaments’ for our tree too!


Check out all of the hosts’ handmade ornaments at the end of the post.
Stenciled Embroidery Hoop Ornaments
Supplies:
- 3 – 3″ or 4″ embroidery hoops
- 1 FolkArt Laser Cut Painting Stencil, 30949 Suzani Splendor
- metallic green, red, and gold acrylic paint
- clear craft glue
- green and red glitter
- Sparkle Mod Podge Waterbase Sealer
- Stencil Brush
- white fabric
- scissors
- skewer or toothpick
- green, red, gold ribbon, string, or trim
Instructions:

Paint embroidery hoops and let completely dry.

Stencil the designs onto white fabric. Let dry and cut out a square around each design.

Two ways to apply stencils to the hoop (I did it the first way):
- Center stencil design on inner hoop. Place outer hoop on and tighten. Remove outer hoop and cut along outside crease. In sections, add a dot of hot glue in four areas of the outside edge of the inner hoop to hold the cut design in place. Apply outer hoop again and tighten.
- Center stencil design on inner hoop. Place outer hoop on and tighten. Cut off excess fabric.

Decide where on the painted areas (add glue on painted areas to prevent it from seeping through) to accent with glitter and place glue in those areas. Use a skewer or toothpick to help spread the glue to fill odd shapes. Let the glitter and glue completely dry for at least 24 hours. Optional – lightly apply clear spray to help keep glitter from flaking off. This will dull the glitter a bit, so it’s optional if you want to apply the spray.
Another option is to skip the glitter and just apply a coat of sparkle Mod Podge over the entire painted design (see gold ornament).
Tie ribbon and trim onto the top of the hoop and it’s ready to hang!
I hope you enjoyed and give this tutorial a try. It’s an easy way to customize ornaments to fit any color tree and a fun project to do in a weekend.
FIND MORE HANDMADE ORNAMENT TUTORIALS BELOW AND SHARE YOURS TOO! Use Hashtag #2016OrnamentExchangeBH so we can see your creations on social media.


Those are gorgeous! I love the idea of painting the embroidery hoops to match the stenciled design! Pinning and sharing! 🙂 Lisa
Oooh! I never thought to use stencils on an ornament; what a great idea. Pinned.
I have chosen your beautiful embroidery hoop Christmas ornaments for my feature at Totally Terrific Tuesday tomorrow. They are fabulous! Have a great Thanksgiving, Erlene!
What a great way to start the week! Thank you so much!
These are so cute and I bet they really pop on the tree! Thanks for linking up to the Talk of the Town Link Party!
Erlene, these are beautiful!! The mini-hoops are darling and I love the stencil you chose, too! Thank you so much for organizing this exchange and hop! I’m enjoying checking out all of the different crafts and ideas.
So creative and I love everything; the stencil, the sparkle Mod Podge and those cute little embroidery hoops! I didn’t know there was a sparkle Mod Podge but I’ve already put it on my shopping list.
These turned out so beautifully! They have a great compromise of vintage and glam!
Erlene, these are beautiful! I love using stencils for all sorts of things, but had not thought about making an ornament using them. Thanks for the great idea!
These ornaments are gorgeous! I love the patterns.
They are fabulous handmade ornament! LOVE the stencil and glitter 🙂
Erlene, I love these adorable ornaments. My grandmother loved to embroider so I will think of her and you when I see these in my tree!
You are so clever! I love you used a stencil to make these. Love Love these!!
Kim
These are super adorable Erlene! I love how you made three of them, you go getter you!
So pretty, Erlene! Love that you added a little sparkle too! Your use of stencils was brilliant! Happy Holidays!!
I love the stenciling effect you created for your ornaments. And the painted frames are such a nice touch. These turned out so beautifully, Erlene 🙂
These are so fun Erlene! What a great gift! Thank you for organizing this great blog hop!
Thanks so much for hosting again this year! There are so many great ideas! I can’ wait to go see them all! Have a wonderful holiday!
This is adorable. I purchased some mini hoops without any idea of what to do with them. I would love added these to a wrapped Christmas present instead of a bow. Thanks!
Erlene, This is so much fun. I will be looking at all of the great ornaments this weekend and hope to make them all. The ornament you created is so so pretty. I love each one that you did.
I love these ornaments. The possibilities are endless when it comes to the stenciled design and color!